Tag Archives: Arts and Crafts inspired

Behind closed doors

Standard

Still sorting out decor for bedroom long wall and battling/circumventing where possible the results of the wet and cold are having on the food plants in the raised beds.  All very sad looking specimens, and that’s not just the plants!

Following a pattern – ‘bamboo’ a fabric screen

Standard

For some reason or other I have a great liking for the late Victorian/Edwardian bamboo tables, screens, whatnots etc with their woven or applied tops and side panels made with pieces from pre-used Far Eastern items.

I think it’s the mix of the occasionally offset geometry of the bamboo supports and sides and the sections of black back-grounded ‘recycled’ patterns and images that attracts me to these lightweight looking examples of furniture.

The opening between bathroom and bedroom areas needs a little screening which made a wonderful opportunity for some lightweight bamboo furniture.

theinfill dollhouse blog - Arts and Crafts Movement - Bedroom and bathroom

And when I came across instructions for the building of a simple bamboo and fabric dressing screen in “Easy to Make Dolls House Accessories” by Andrea Barham, I thought I’d accept the challenge.

The old story

The instructions are beautifully clear with informative diagrams.  I brooded on my lack of the vice described in the instructions and figured I might just be able to make the necessary pin/nail holes by hand.   The alignments would be a little off but might be manageable, but nothing ventured …

I fancied a bit of variety in ‘bamboo’ size as the idea of using the meat skewers/barbeque sticks throughout felt it might be harder on the hands.  I dug out my collection of lollypop sticks which fortunately held a pack of 6” wooden round ones which I thought might be easier to handle and use as the vertical pieces.  It is, of course, possible that the skewers I’ve got can be bought in sturdier thicknesses, but I don’t have any and the lolly sticks do the job.

theinfill dollhouse blog - Arts and Crafts Movement - Bedroom and bathroom

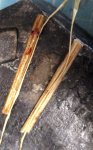
Lollipop sticks, various, and a selection of skewers and sticks painted and varnished

Painting the sticks up was fun and I did a few more for safety, hoping perhaps to still have spare so that I might get round to making a small side table using some of the techniques described in this pattern.  The painting job is to make the wood look miniature bamboo.  Ironically, the meat skewers are bamboo and their manufacturing process often makes them resistant to dye colours, so I used some a mix of wood dye plus various felt tip pens and a little paint.

Other adjustments made

For some reason, though the instructions advise placing the first pins in the ends of the horizontals to fit holes in the verticals, I found it all easier to do it the other way round, with the pin in hole on the thicker upright to go in the hole in the end of the bamboo horizontal.

I used cut sequin pins for these joints as I’m fairly used to them from some previous furniture kits.

The fabric panels need hand sewing all around and they thread on the thinner sticks. There are measurements given for the fabric needed but as the cloth I was using looked thicker than shown in the book’s photo, I did some gauging of the measurements to use to try to allow for it.

I made the width of each of my pieces an inch less than advised to take into account both the gathers taking up more space horizontally and the bulkier folded top and bottom hems using more length of fabric.  The print on the cloth is a little large for the scale but looks more or less OK when gathered up.

The length proved to be the fiddly thing to adjust to keep it reasonably taut (well not too floppy) while not  pulling the pinned and glued horizontals out when threading the two hems on together.  For the approximate 10.55 cm distance between horizontals in the frame I’d made thus far, I made the finished drop between the stitch lines on the hems 11.6 ish cms when the hems were completed.

There is some binding to be done of horizontals to strenghten the joints as well as to create the hinging of the two pieces.  I used rafia as directed which then needs disguising so the fabric panels needed pinning out of the way.

Result

The instructions were easy to follow and the finished product does, indeed stand up.  I’m hoping all the gluing, painting and binding will make it a little sturdier as it dries out further.

theinfill dollhouse blog - Arts and Crafts Movement - Bedroom and bathroom

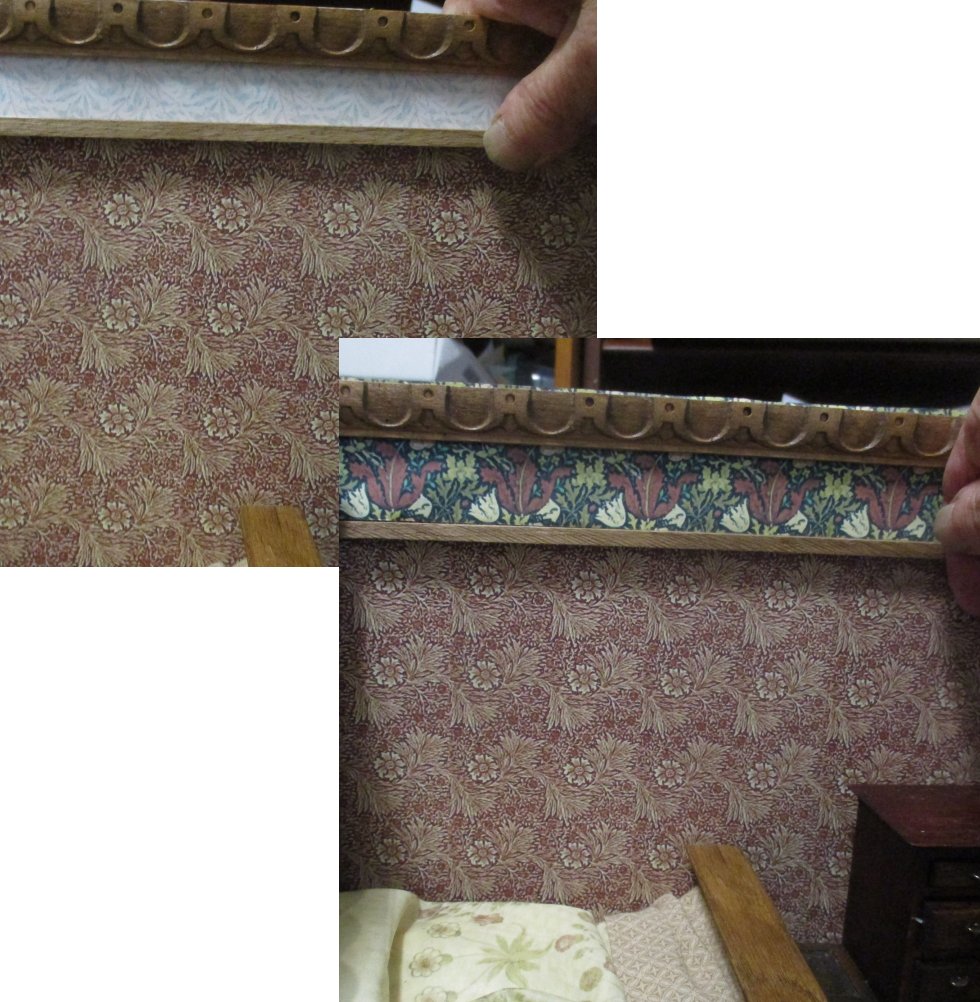
Before and after re-touching up

The inner face is the back of the panel fabric print, and, although no one will see it, I’m thinking of adding a flat piece of probably white fabric on that face, stretched across the back of the hems.   It may help strengthen the structure a little.  Or it may make it fall over backwards.  This is always assuming I don’t break the whole screen just fitting this lining.

—~—

A little time later

First I ran a thread through top and bottom hem tunnels on both panels, catching the gathers as I went in order to hold them at a set width, keeping them as clear as possible of the pinned joints without leaving too much of a gap.

theinfill dollhouse blog - Arts and Crafts Movement - Bedroom and bathroom

Then I gently bound the bare ends to stop too much movement.  It also prevented the sewing thread from entangling the ends of the poles while stitiching.
Should probably have used a less sticky tape – removing it was a little stressful.
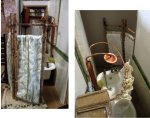
I was quite pleased that I’d managed to produce something that balanced and hadn’t broken it putting on the somewhat crumpled liner.

theinfill dollhouse blog - Arts and Crafts Movement - Bedroom and bathroom

That is, until I was processing the photos and spotted the sprung joint on the bottom left!
Fixed and presently drying, I hope.


A tale of two parts

Standard

Part the First

Feeling a little more settled about what was going to be in this room box, it was time to finally decide what form the fourth wall should take.

Another slide in from above as for the dining room, a see through wall as in the kitchen; an interference fit for a switch back to old ways as in Hogepotche Hall?

Sadly I’d been imagining it as hinged and I’m terrible at fitting hinges.  A piano hinge was used for the study fourth wall but it didn’t fit that well and I’d made multiple tries to get it right.

The thought this time was more along the lines of a more traditional hinged couple of doors.  Partly because the box space has two room functions, as in the kitchen/breakfast box thought in this case they entirely open together to the viewer, which would mean that the fourth wall for this box would have to reflect both room spaces’ activities and decor across its single width.

Putting them both on one flush surface was not what I’d fancied.

theinfill dollhouse blog - Arts and Crafts Movement - Bedroom and bathroom - Victoria Villas 4th wall

I’d done it once before in Victoria Villas (four rooms all together- two kitchen/living spaces and two attic style bedrooms)
I disliked it very much, calling it “the offending wall

If, instead, the fourth wall this time were to be divided into two hinged sections then, the theory goes, it should prevent the ‘patchwork quilt look’ of the above. The two halves would, when open, hopefully give each space the feeling of being extended outwards towards the viewer separately.

So much for the theory.  I’ve done one of the doors so far and it just about hangs straight and seems to open and close without falling foul of anything.

theinfill dollhouse blog - Arts and Crafts Movement - Bedroom and bathroom

A ‘bit of a room extension’

Part the Second

Somewhere in amongst all the fiddling around with very small screws and delicate hinging, an awkward thought struck me.  I’d altered the size of the bathroom window and chosen a frame that is that little bit larger.  This would have building implications regarding the yet to be started Sitting Room Box!  (That mucks up the ‘planning consent’)

The bedroom and sitting room boxes are to sit back to back, with the bedroom/bathroom overlapping, it being slightly the longer of the two.  The fractionally larger bathroom window has messed this up and the sitting room base shows that it now overlaps the window just a little.  The external view below shows how little it is.

theinfill dollhouse blog - Arts and Crafts Movement - Bedroom and bathroom

A small overlap but it really messes up the five boxes together theme of the build.

Today I set the boxes out together, ensuring the existing doorways overlapped correctly

and figured out a new room size for the sitting room box.  It loses a little width and gains a little depth, so not too bad a mess up.  And the existing doorways all match up.

The return of Part the First

Another long period of ‘deep thought’.  Oscar Wilde reportedly said “This wallpaper is killing me.  One of us has to go

I can hardly complain that the bedroom wallpaper is proving lethal, but it has been getting on my nerves.  The balloon above my head ‘big idea’ to get over this was to put a border paper between the ceiling cornice and the picture rail, to give the eye a break from the relentless Morris pattern in maroon.  So I messed about a bit in the selection of papers etc to hand, trying to find something that wasn’t going to take over or clash and was not generally intrusive and do the job I wanted.

theinfill dollhouse blog - Arts and Crafts Movement - Bedroom and bathroom

Trying out some probably unlikely borders

In the end I went with printing out a single colour selected in my photo manipulating software from the main wallpaper and have been using strips to fill the space and releave the eye a little.

theinfill dollhouse blog - Arts and Crafts Movement - Bedroom and bathroom

Bit pinky in shade and looking odd running at the top of the hinged fourth wall

It doesn’t look quite as odd in the box itself, thankfully.

Should look better still with an all white ceiling and when more lights are added.

You may notice that somewhere in there I added the cornice running around the room and nearly broke my hands cutting mitres in the wood piece, but it doesn’t look badly thrown at the wall and should hold up that proposed ceiling nicely.

I’ve been fighting shy of adding the wooden door to the bedroom and I think I may use a fabric hanging instead so that the bedroom/bathroom combo becomes one with the study, the private ‘unit’ being shut off from the rest of the house by the study door into the kitchen.

Bathroom

Standard

Between gardening, home needs, dentist, shopping and the reading of a book much recommended by my daughter, which is proving a little annoying, I’ve managed to shoehorn in some thought on the room box which I deliver for your perusal.  Apologies, my language is being influenced by the reading of aformentioned somewhat ‘over written’ book.

So, without more ado, wend this way for the viewing of the bathroom works.

The information and photos on Arts and Crafts interiors tends to be a bit short on detail regarding both kitchens and bathrooms.  Thankfully, there are many images of both covering general late Victorian cooking spaces and ‘powder’ rooms.

Also I’ve a firm memory of visiting a number of Victorian created bathrooms, both in large stately homes and in my grandparents’ house.  Some of rooms were huge and echoingly high and some so narrow you smashed your elbow if you moved too fast. There were plain white procelain items, much patterned lavatory bowls inside and out, wash handbasins big enough to swallow you whole and baths so narrow someone was going to get stuck. I once fell off the step upon which the lavatory was raised and was too embarassed to explain how I’d managed to bang my head while visiting the bathroom.

Very broadly bathrooms seem to fall roughly into two categories:  all boxed in with plenty of woodwork not a pipe in sight with the possibility of a raised bath and/or toilet, or every pipe available on show with the latest contraption looking more like an instrument of torture as a main feature of the room.  I came across Vivacious Victorian, a site with some delightful examples of both types and lots more plus historical details and publications which I found very entertaining.

I tend to lean towards the steampunk idea of a Victorian bathroom though not so dark and with a definite tilt in the direction of Heath Robinson with cogs, pipes and possibly an elastic band thrown in for good measure.  (Heath Robinson Museum)

Unfortunately I lack the skill and wit to carry out any of the above so have gone for a compromise between the two styles to which I’ve reduced my choices.  I’ve boxed in the toilet cistern and put it on a plinth plus crammed in a number of copper looking things in the very small space I’ve left to build it in.

I need to clear up a bit, perhaps re the oil bottle stopper shower head.

Have you ever opened a bottle of olive oil or similar, usually while in the middle of cooking and needing the oil urgently?  They tend to have a plastic ring-pull which your hands, too slippery with adding ingredients to the pan, just won’t manage to grip.  When you’ve finally get it out of the bottle neck you may have in your hand a plastic ring attached by a short stem to a slightly domed cap.  I hacked off the ring and stem, painted the cap copper and glued it to the similarly hacked off head end of a copper draining spoon.  I made a hole in the center of both (before gluing together) and inserted a length of real copper wire through them, hammering back the drainer spoon end of the wire to hopefully make it stay in place.  One shower head.

Off to see what seeds may have germinated today in the trays of basil, marigolds and nasturtiums and then I’d best go check to see if that shower has fallen off the wall yet.